Install | kodi.kiwi.yt
You can install the kodi.kiwi.yt kodi build on Kodi 20 "Nexus" or Kodi 19 "Matrix". This install guide assumes you have a fresh install of the kodi media center software on your device and your device is connected to the internet.
The Kodi media center software is available for a wide range of devices including phones, tablets and computers running Windows, iOS, OSX, tvOS, Android, Linux or Raspberry Pi. You can install Kodi on your device from its app-store or from kodi.tv/download
Navigating in kodi
• Navigate is done with the 'Arrow Keys' on your keyboard or remote or by "Screen Tap" on a touchscreen or with a mouse.
• OK can be "Enter" on a keyboard, the "OK" button on a remote, a "Left mouse click" or a "Screen Tap" on a touchscreen.
• Back can be "BackSpace" on a keyboard, the "Back" button on a remote, a "Right mouse click" or a built in back button.
Part A | Configure Kodi to enable notifications and unknown sources
Configure step 1
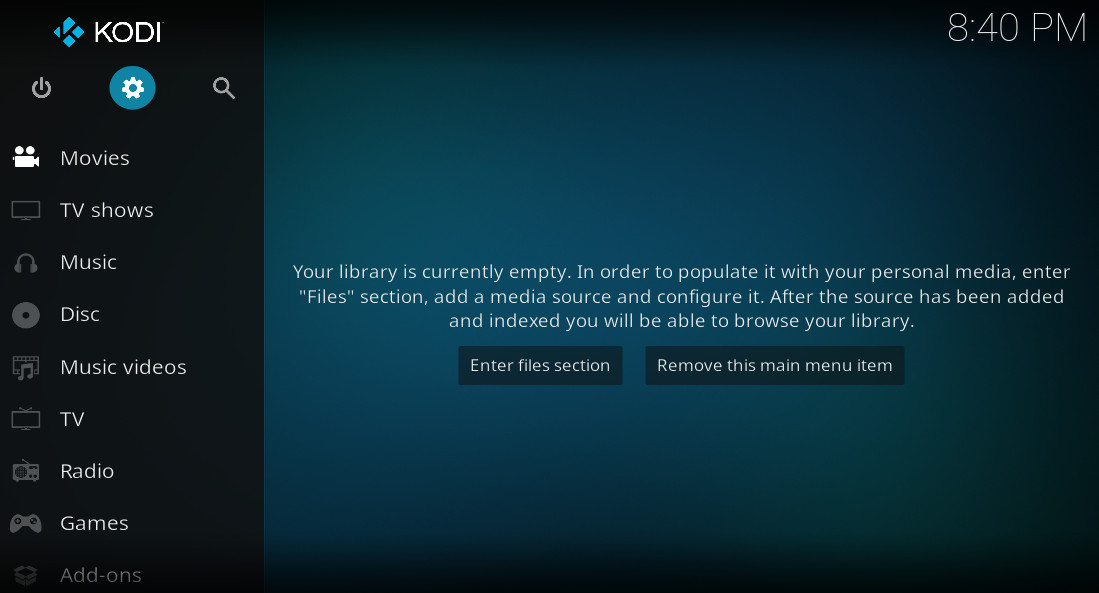
Navigate to "Settings cog", press OK
Configure step 2
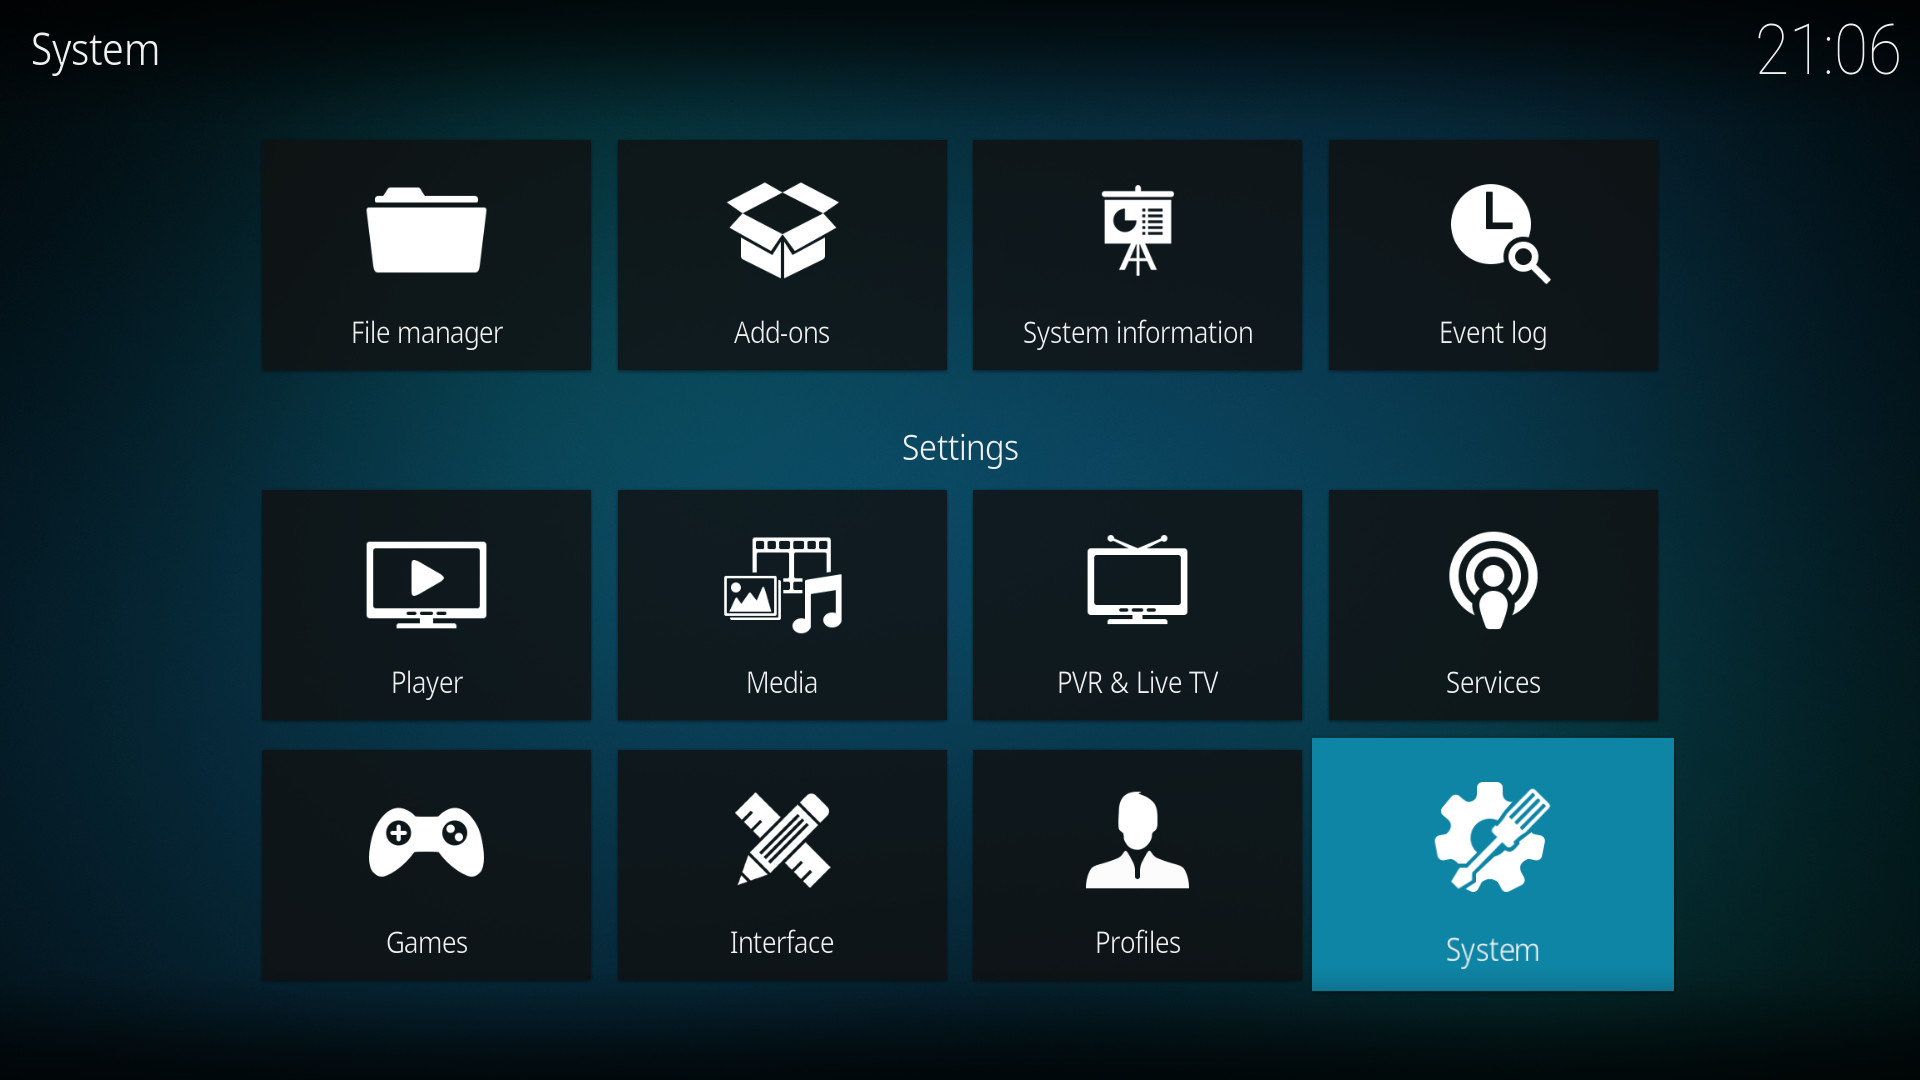
Navigate to "System", press OK
Configure step 3
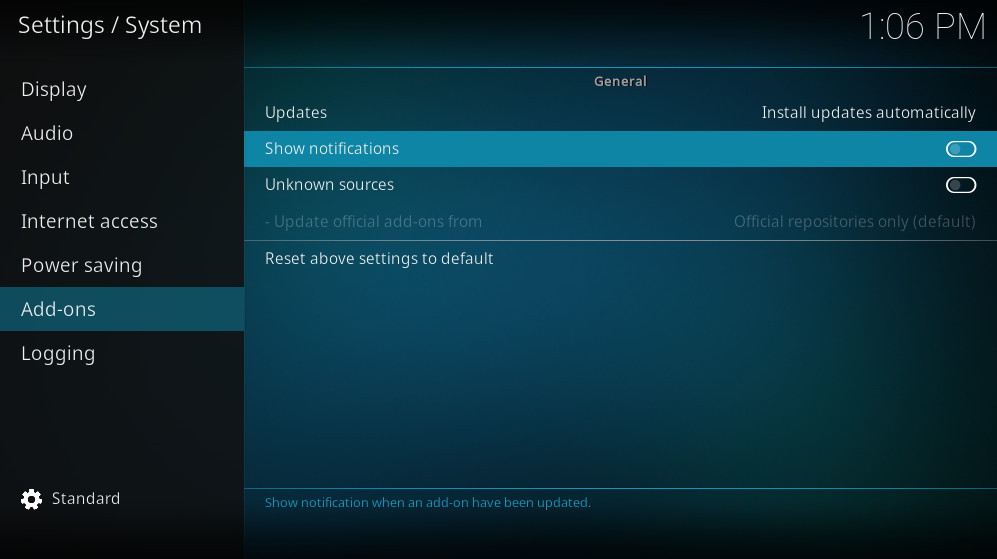
Navigate down to "Add-ons" and across to "Show notifications", press OK
Configure step 4
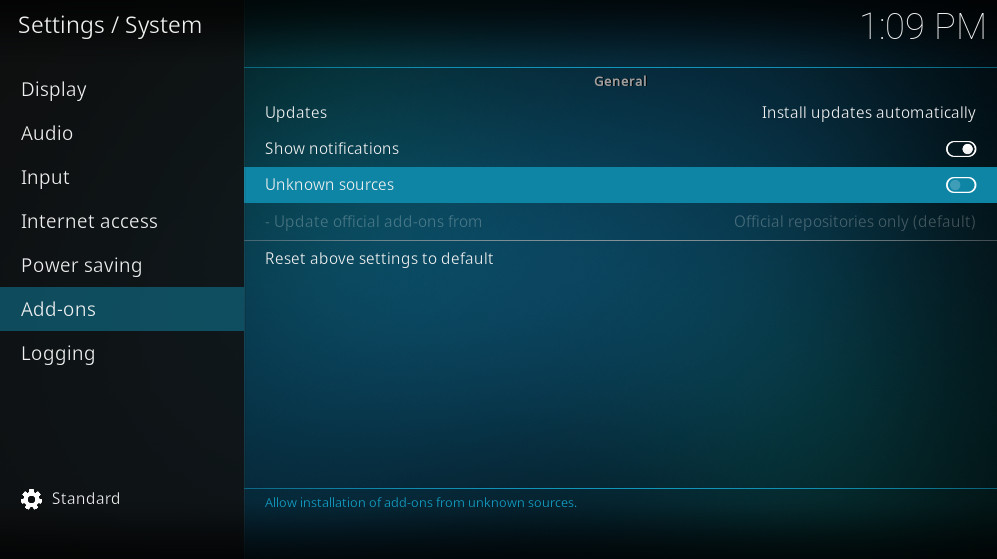
Navigate to "Unknown sources", press OK
Configure step 5
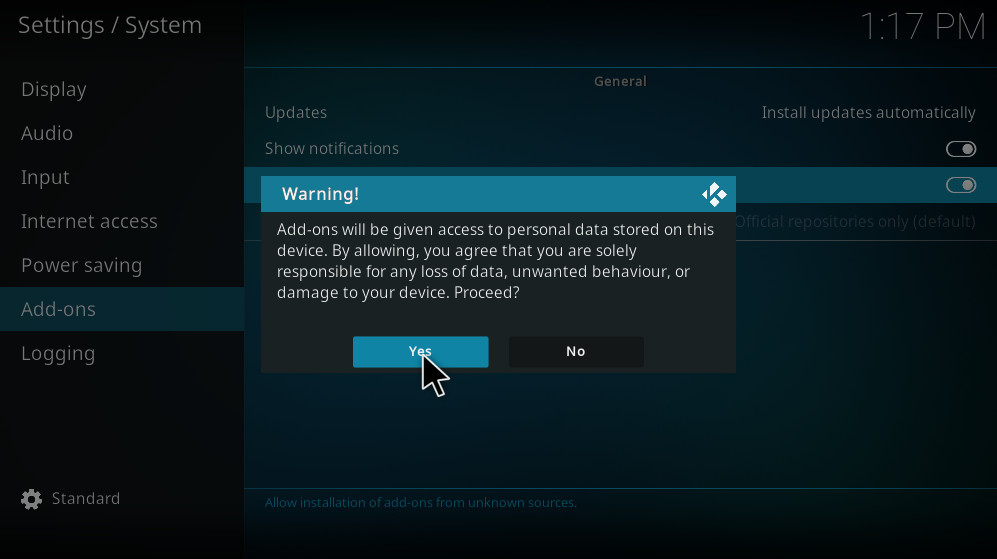
Navigate to "Yes", press OK
Configure step 6
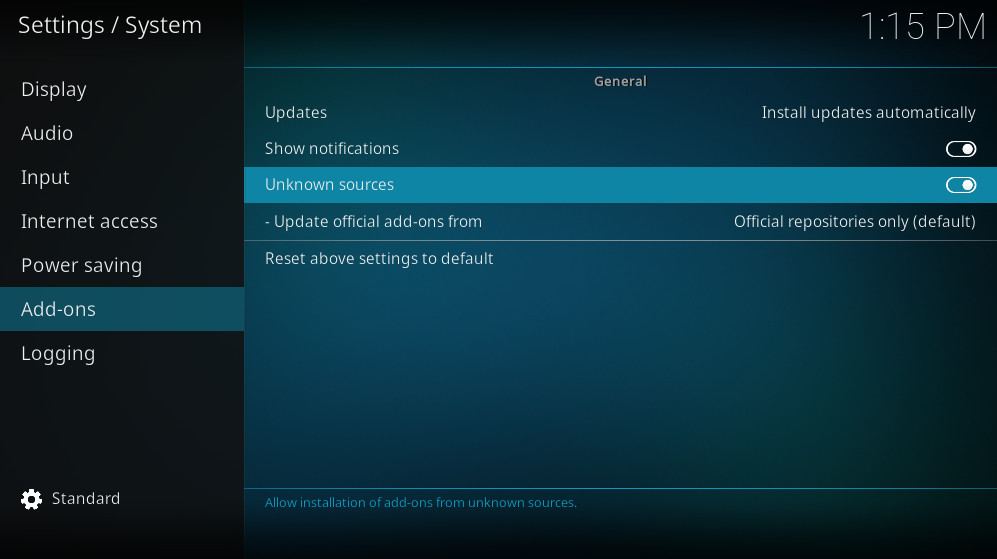
Kodi configuration is now complete. Press "Back" and move to Part B
Part B | Add the kodi.kiwi.yt build source
Add source step 1
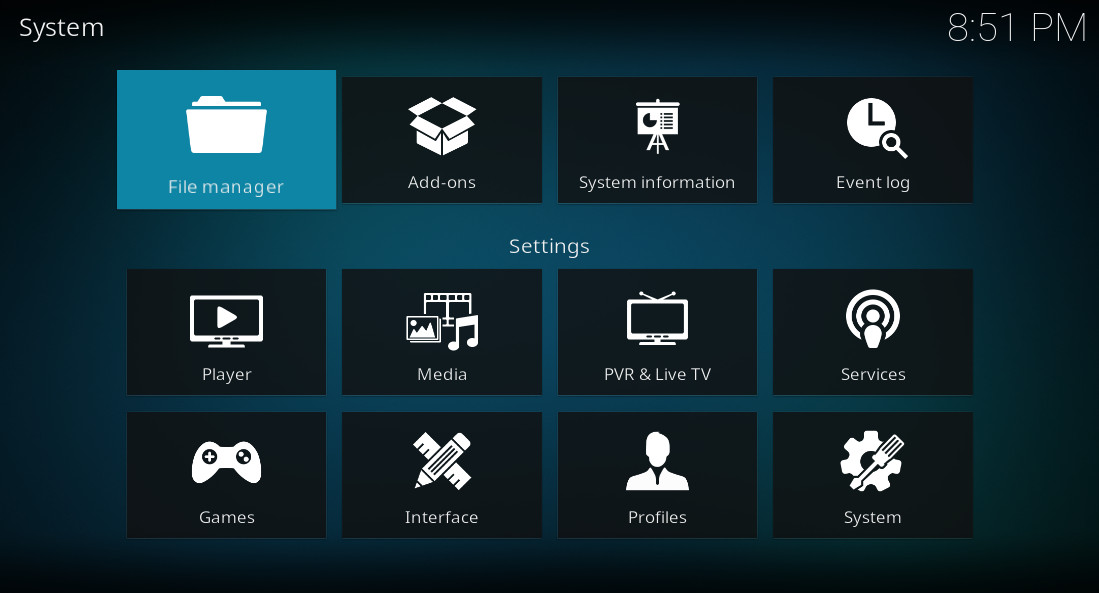
Navigate to "File Manager", press OK
Add source step 2
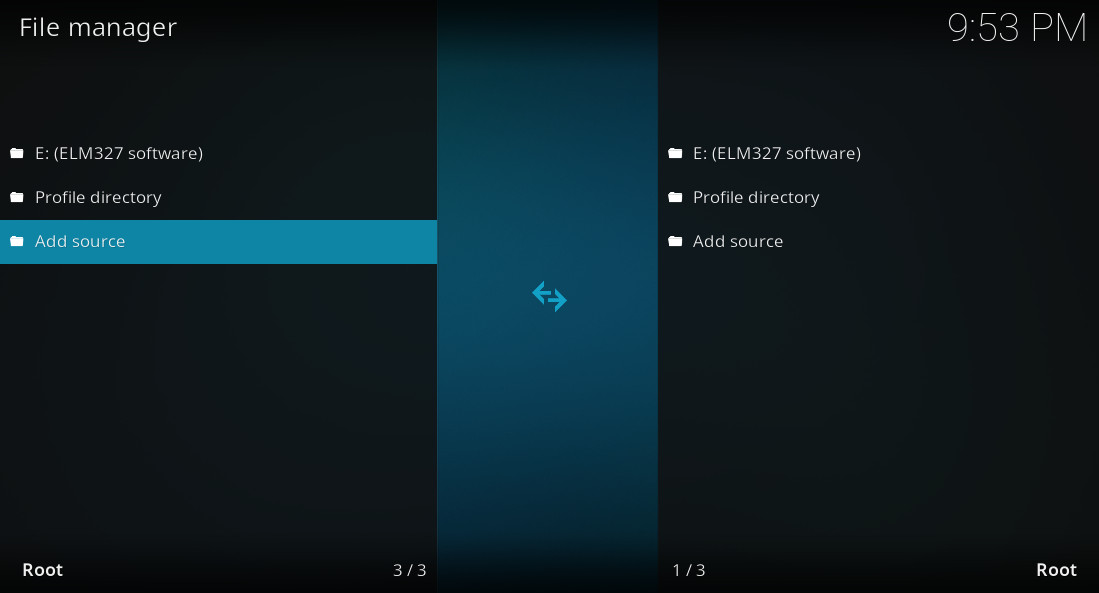
Navigate to "Add source", press OK
Add source step 3
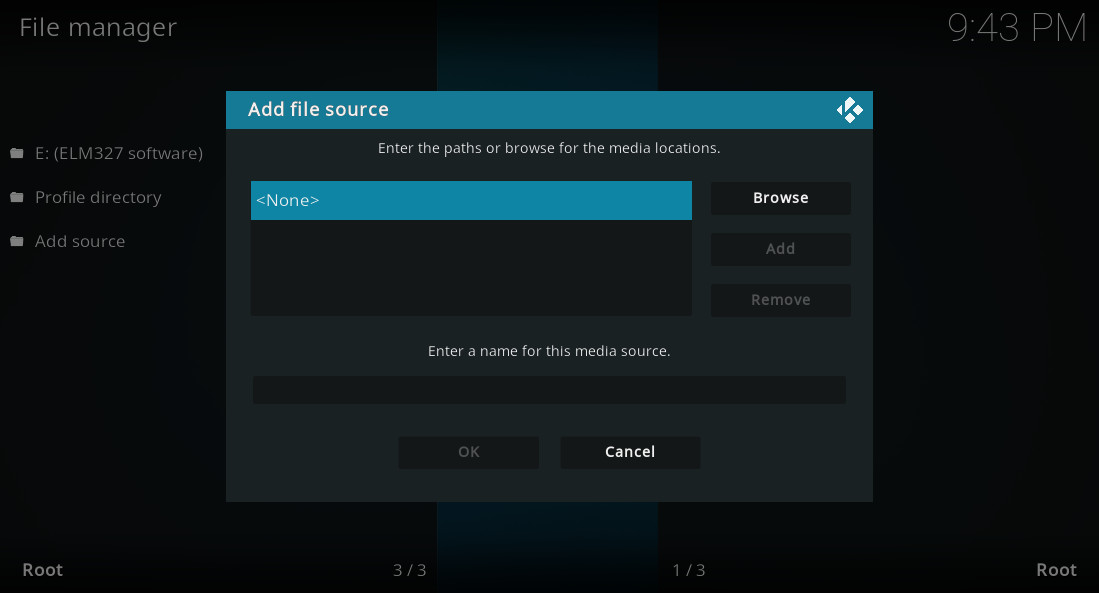
Press OK
Add source step 4
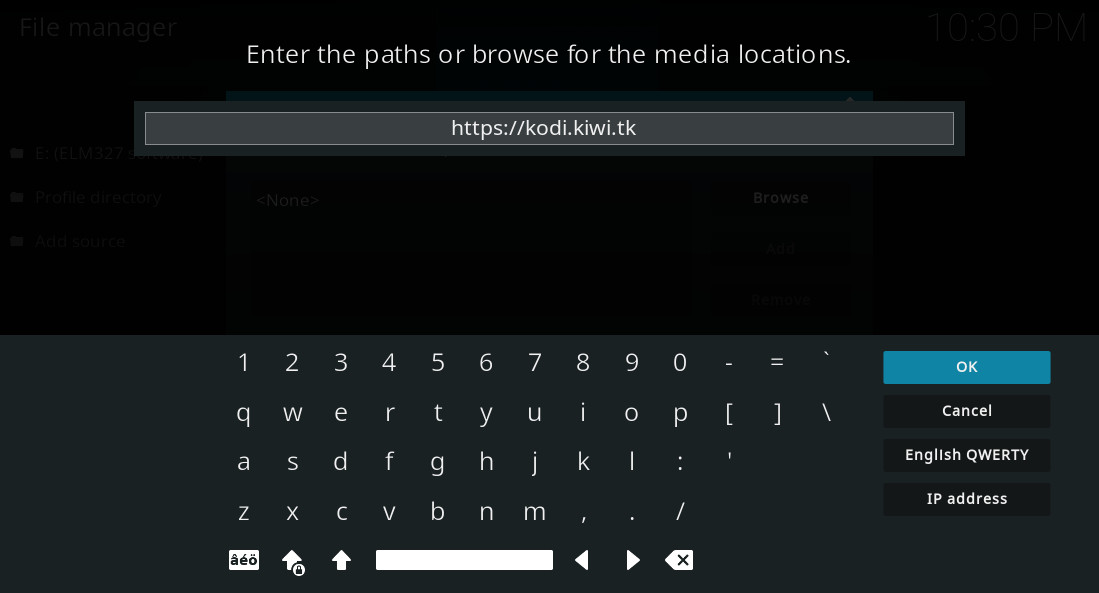
Type in "https://kodi.kiwi.yt", navigate to "OK" and press OK
Add source step 5
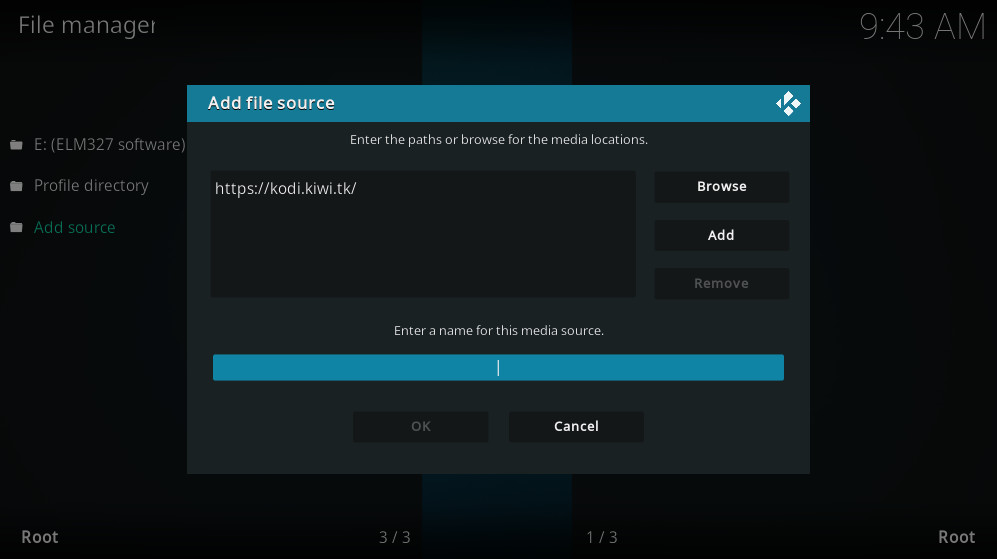
Navigate to "Enter a name for this media source", press OK
Add source step 6
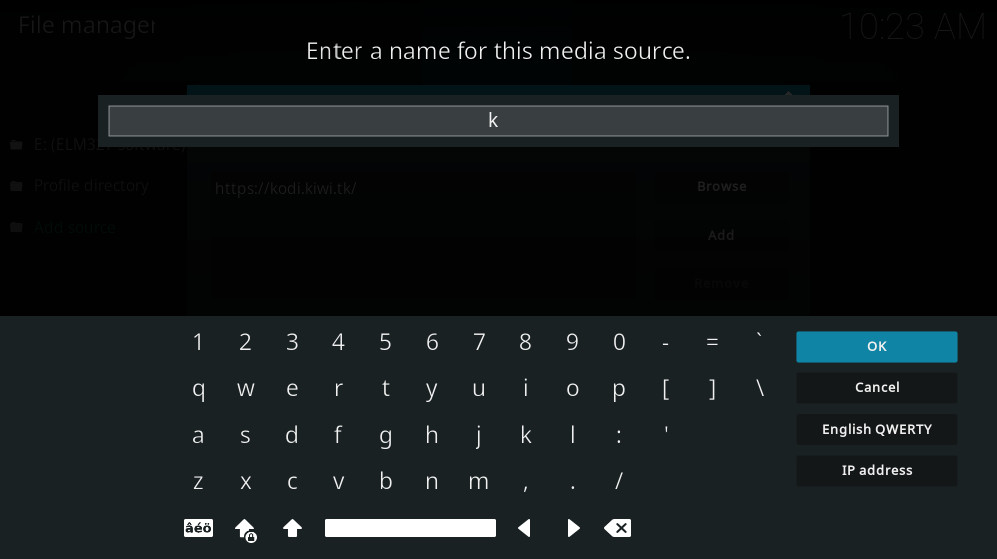
Type in "k", navigate to "OK" and press OK
Add source step 7
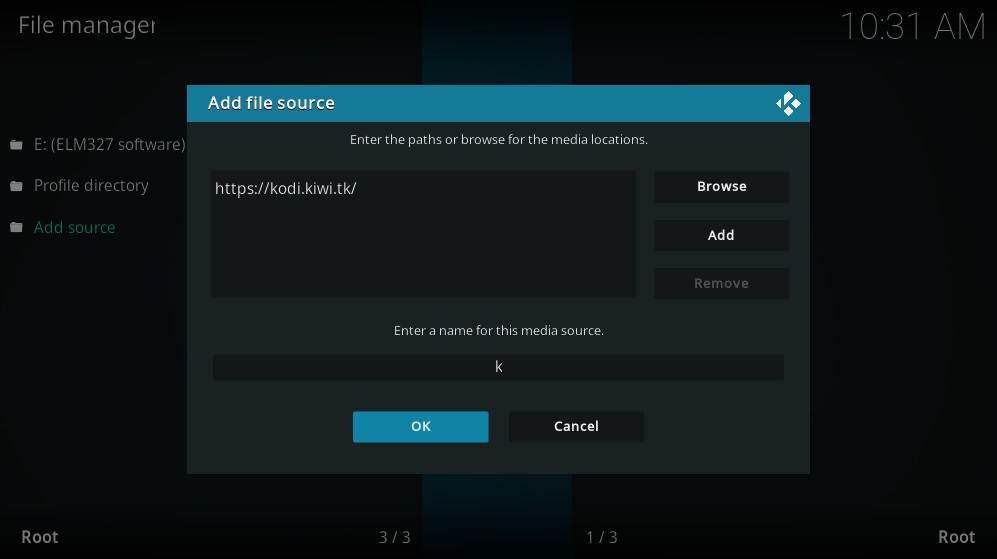
Navigate to "OK", press OK
Add source step 8
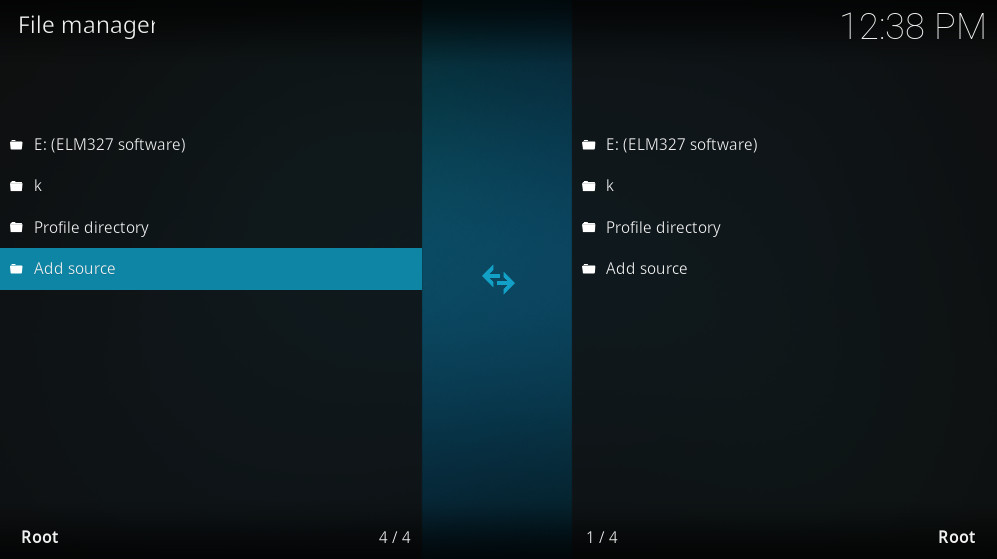
Adding the kodi.kiwi.yt source is now complete. Press Back and move to Part C
Part C | Install the kodi.kiwi.yt build
Install step 1
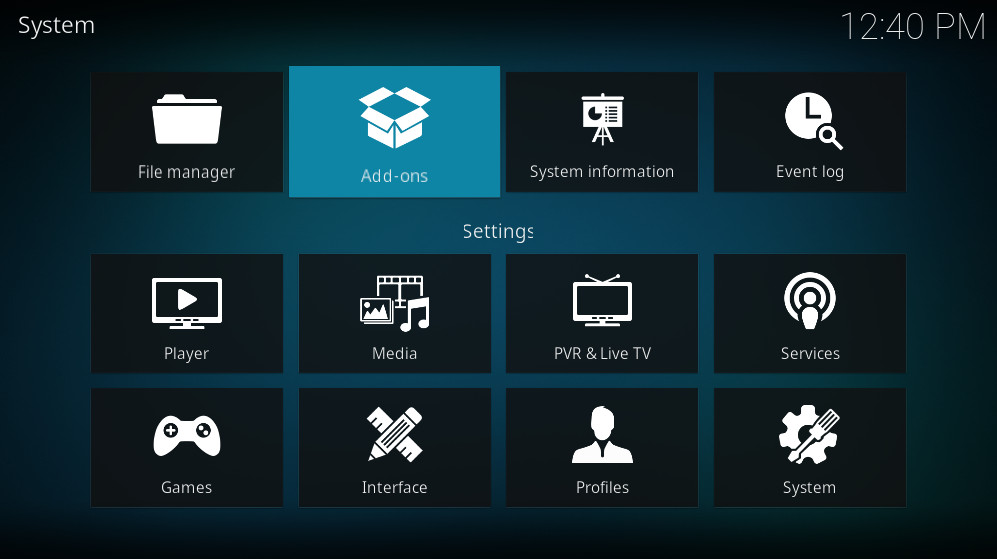
Navigate to "Add-ons", press OK
Install step 2
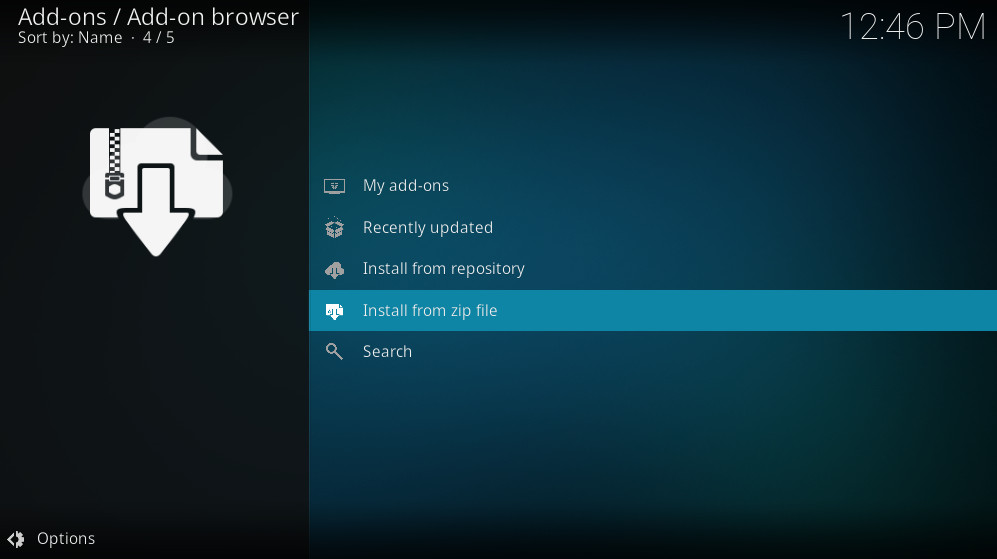
Navigate to "Install from zip file", press OK
Note: Kodi 19 users may see an extra message here. navigate to "Yes", press OK
Install step 3
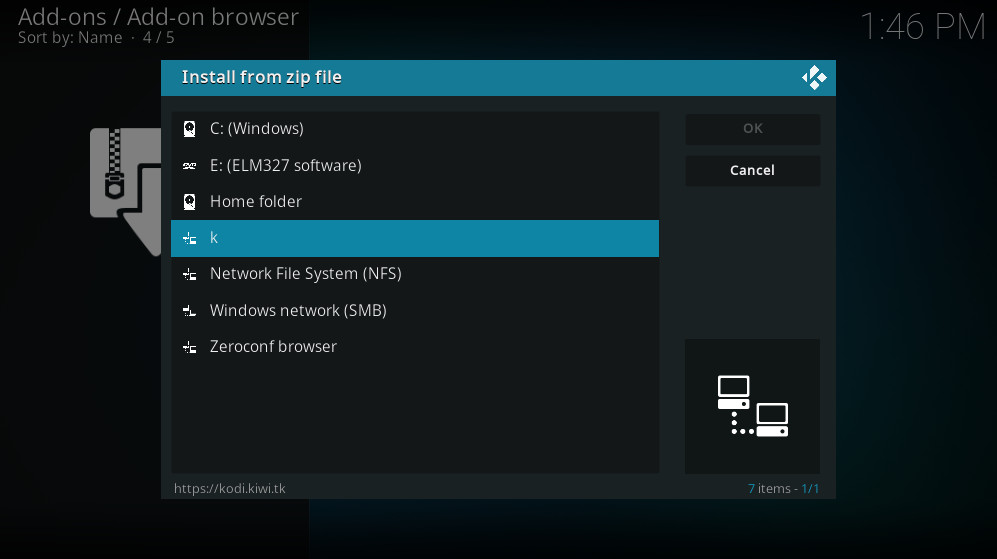
Navigate to "k", press OK
Install step 4
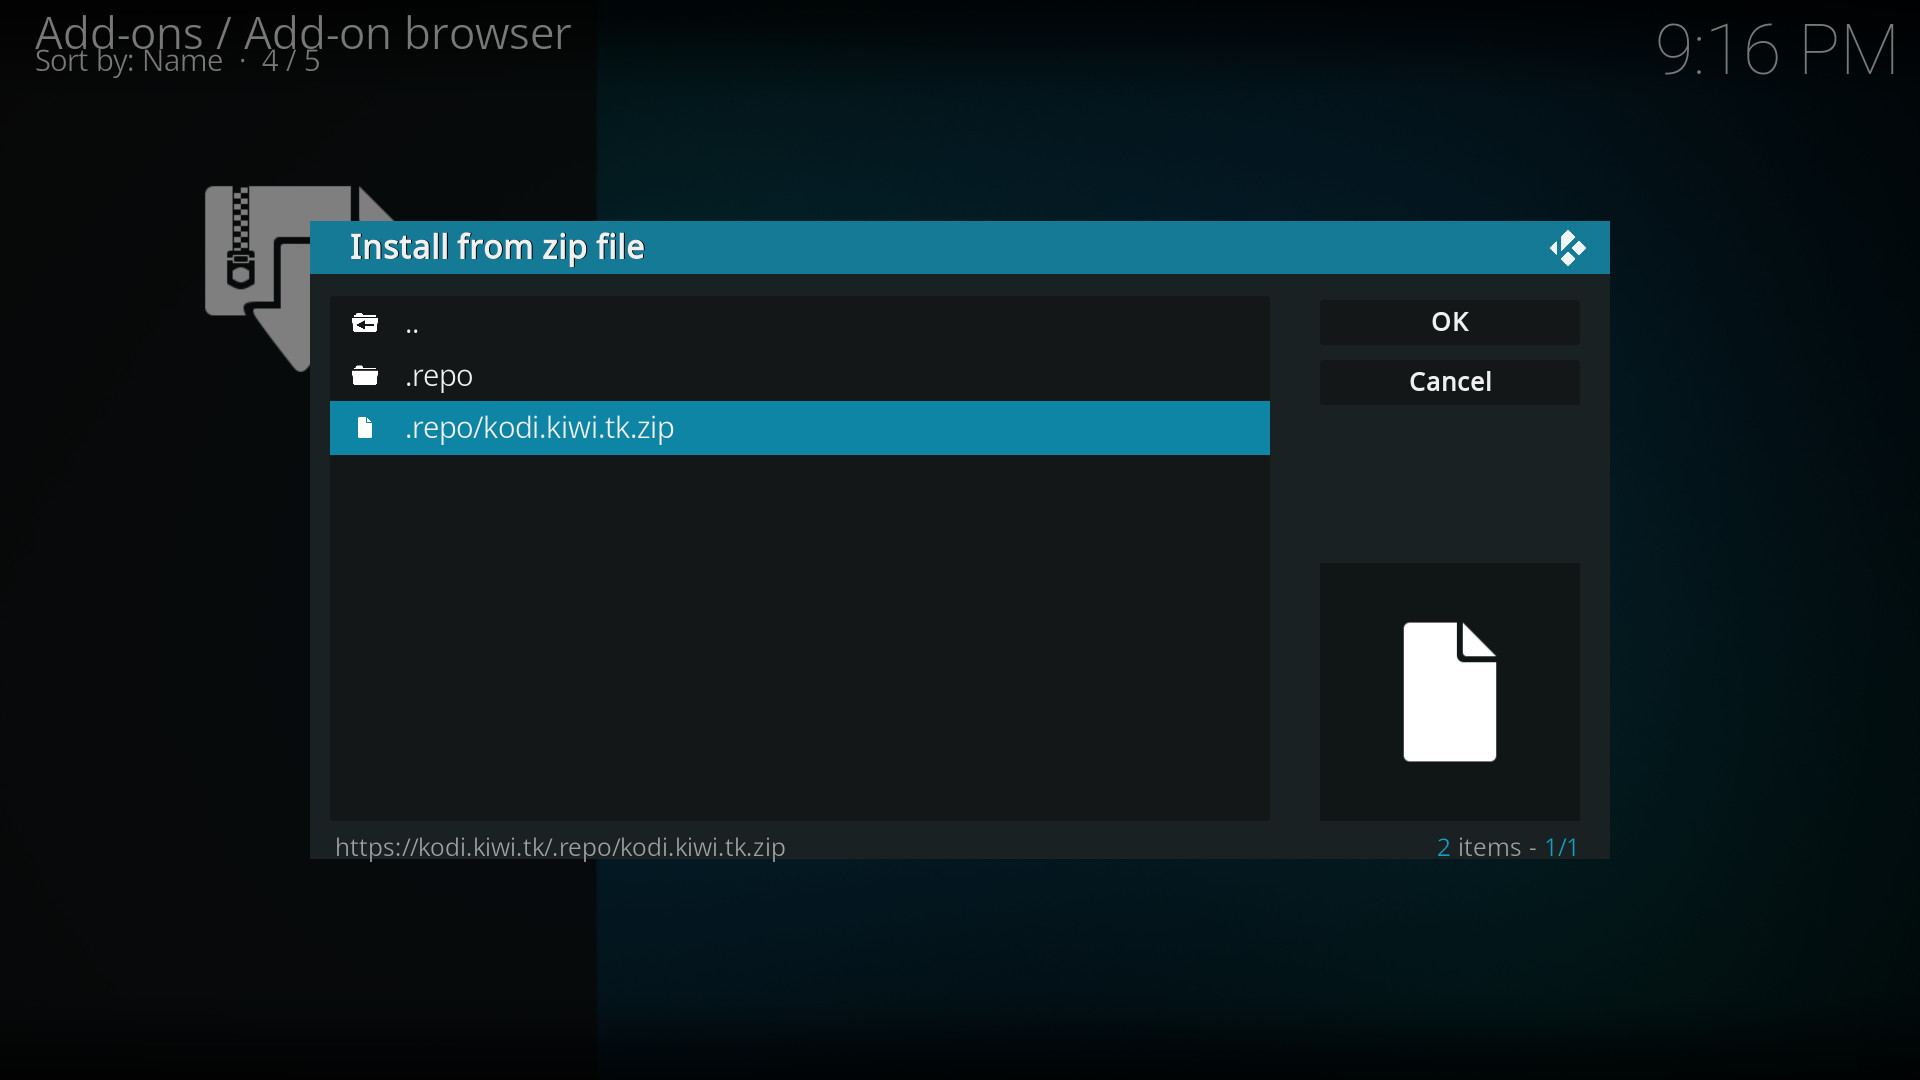
Navigate to ".repo/kodi.kiwi.yt.zip" press OK
Install step 5
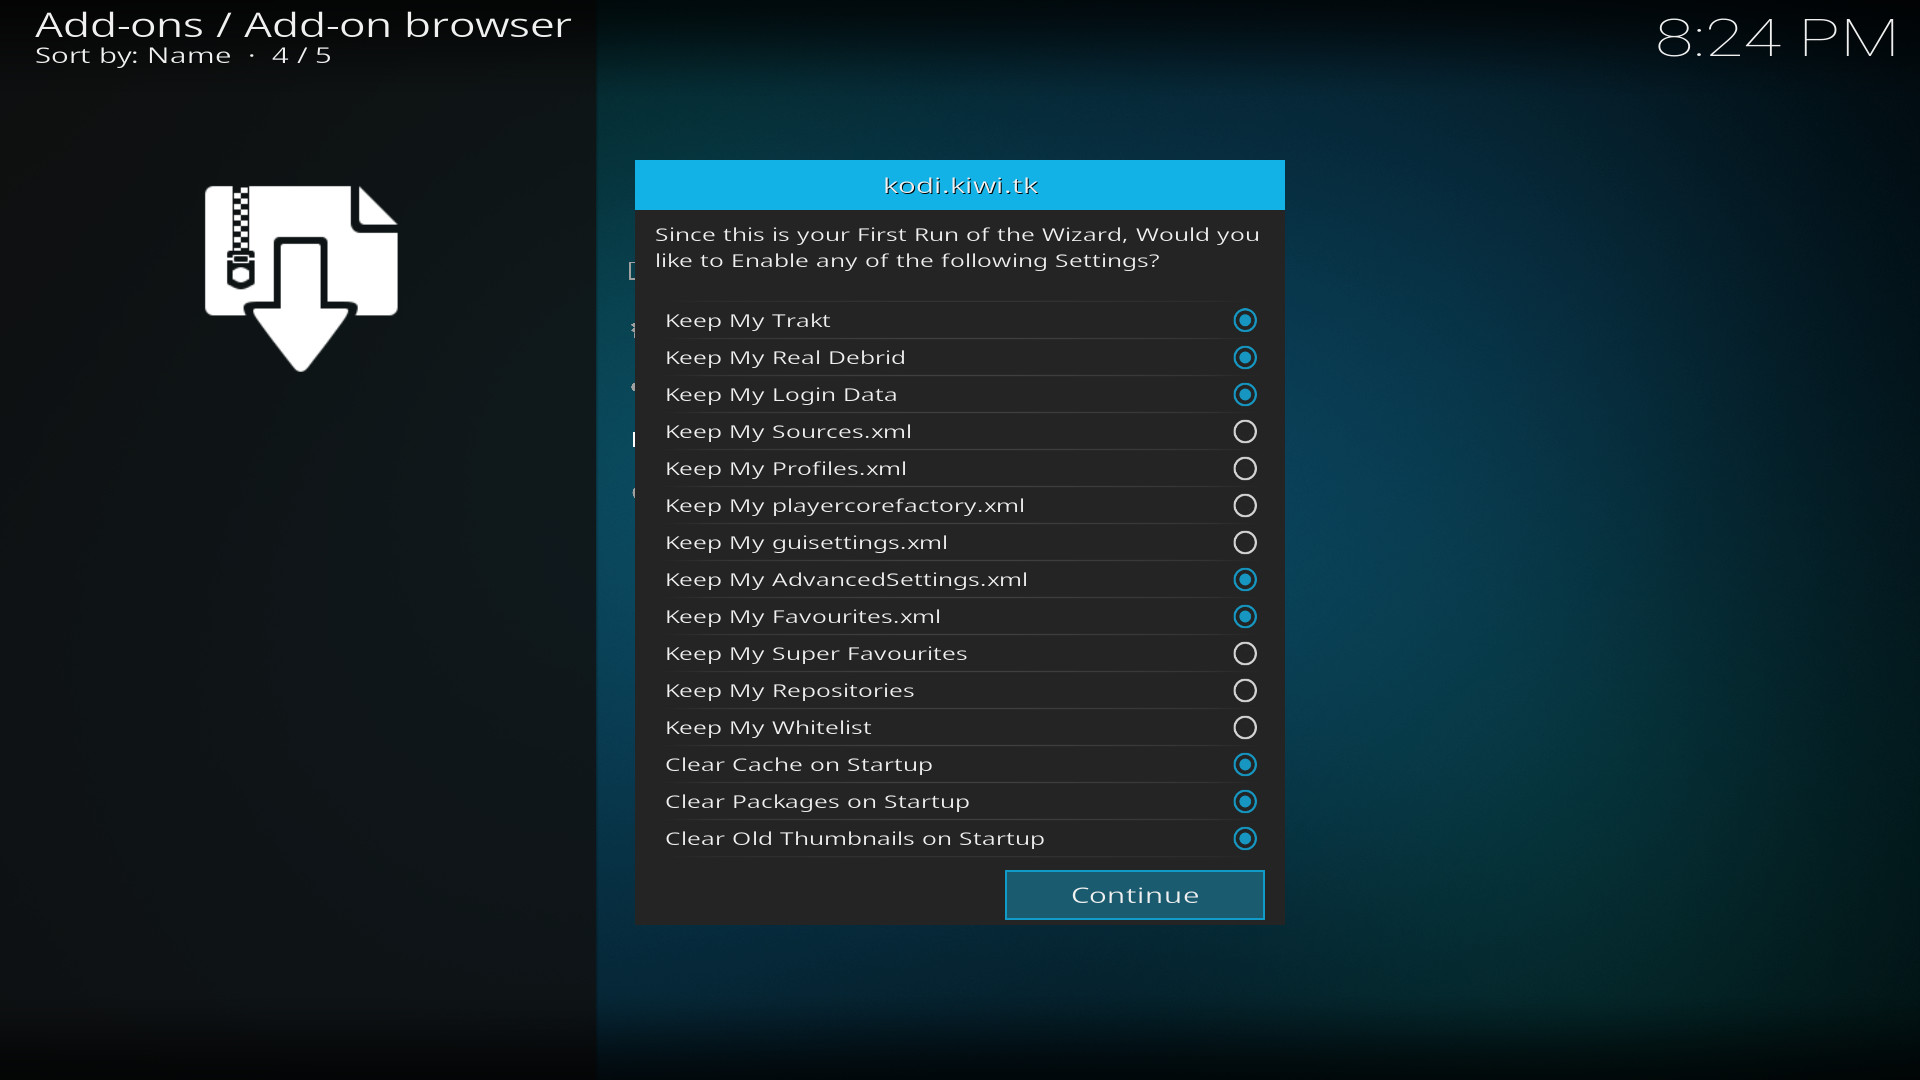
Wait for the add-on to install.
this might take a few minutes.
Navigate to "Continue", press OK
Install step 6
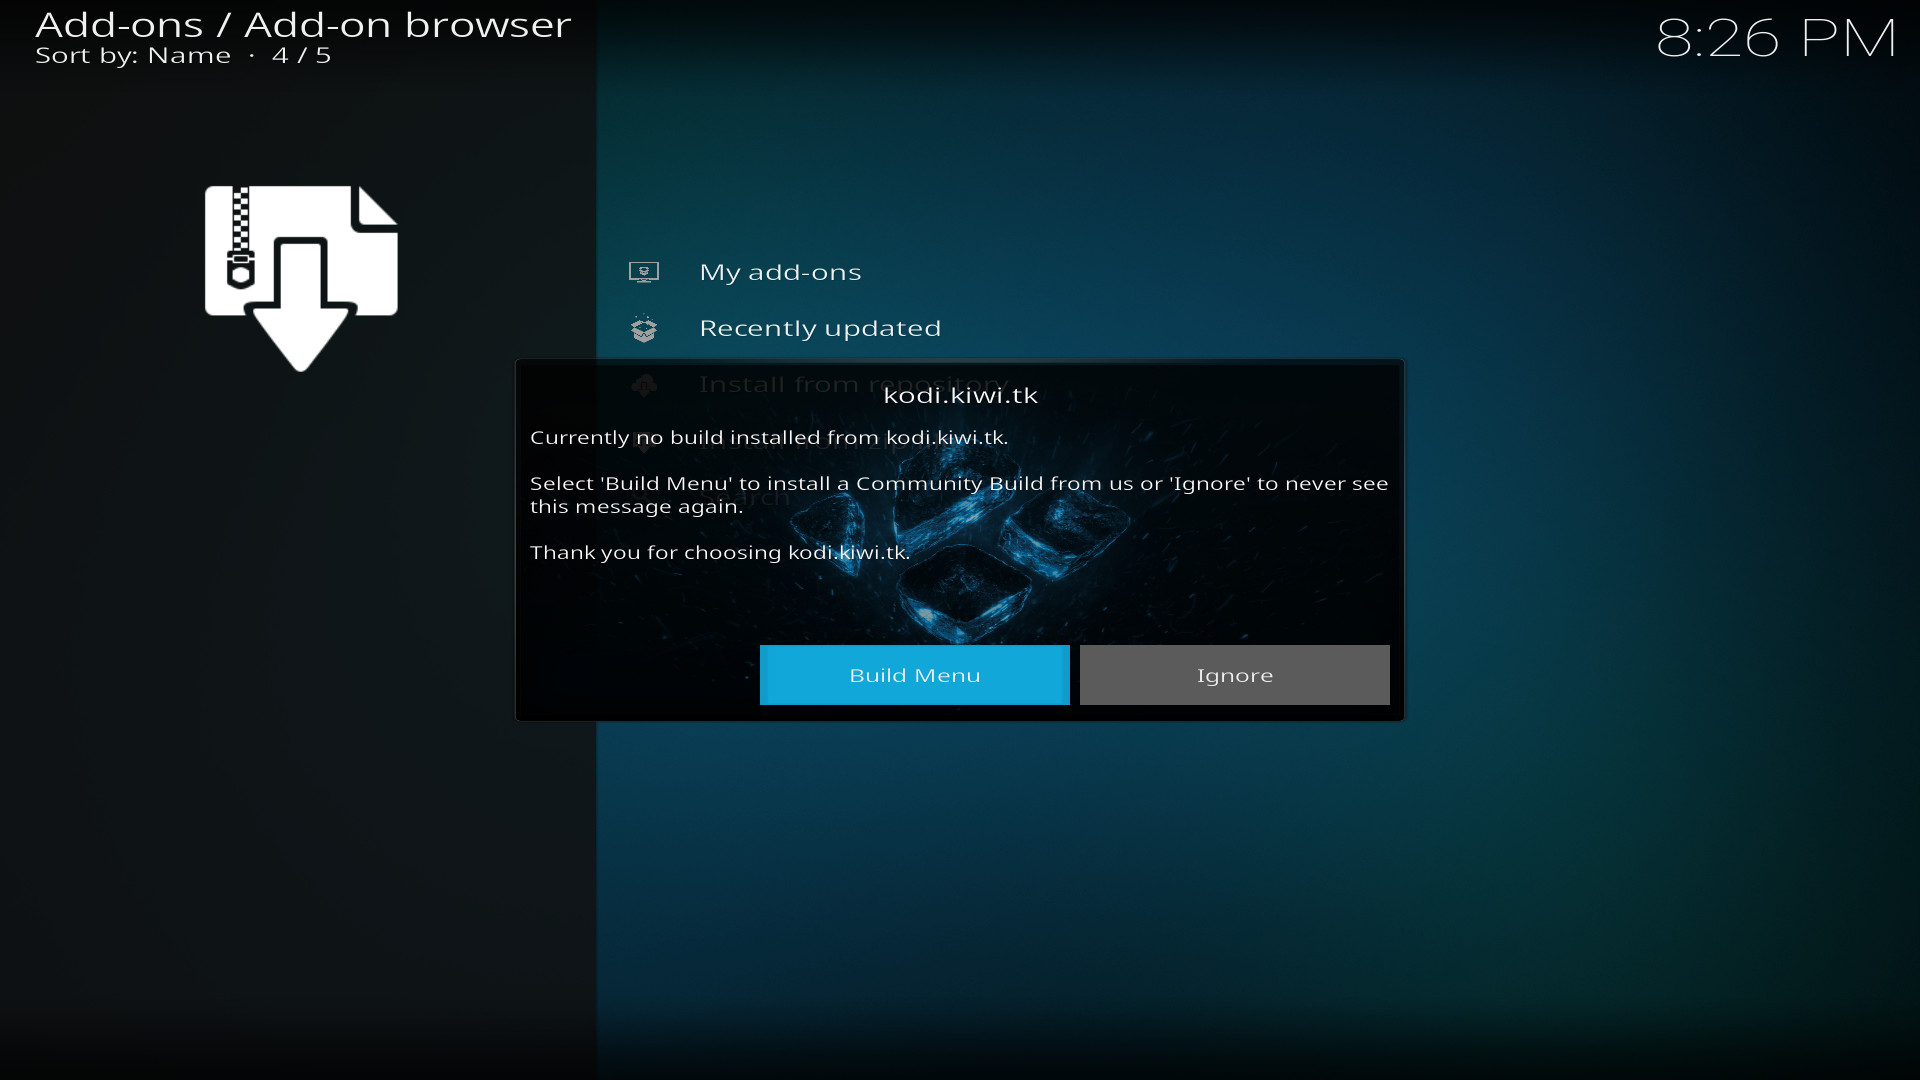
Navigate to "Build Menu", press OK
Install step 7
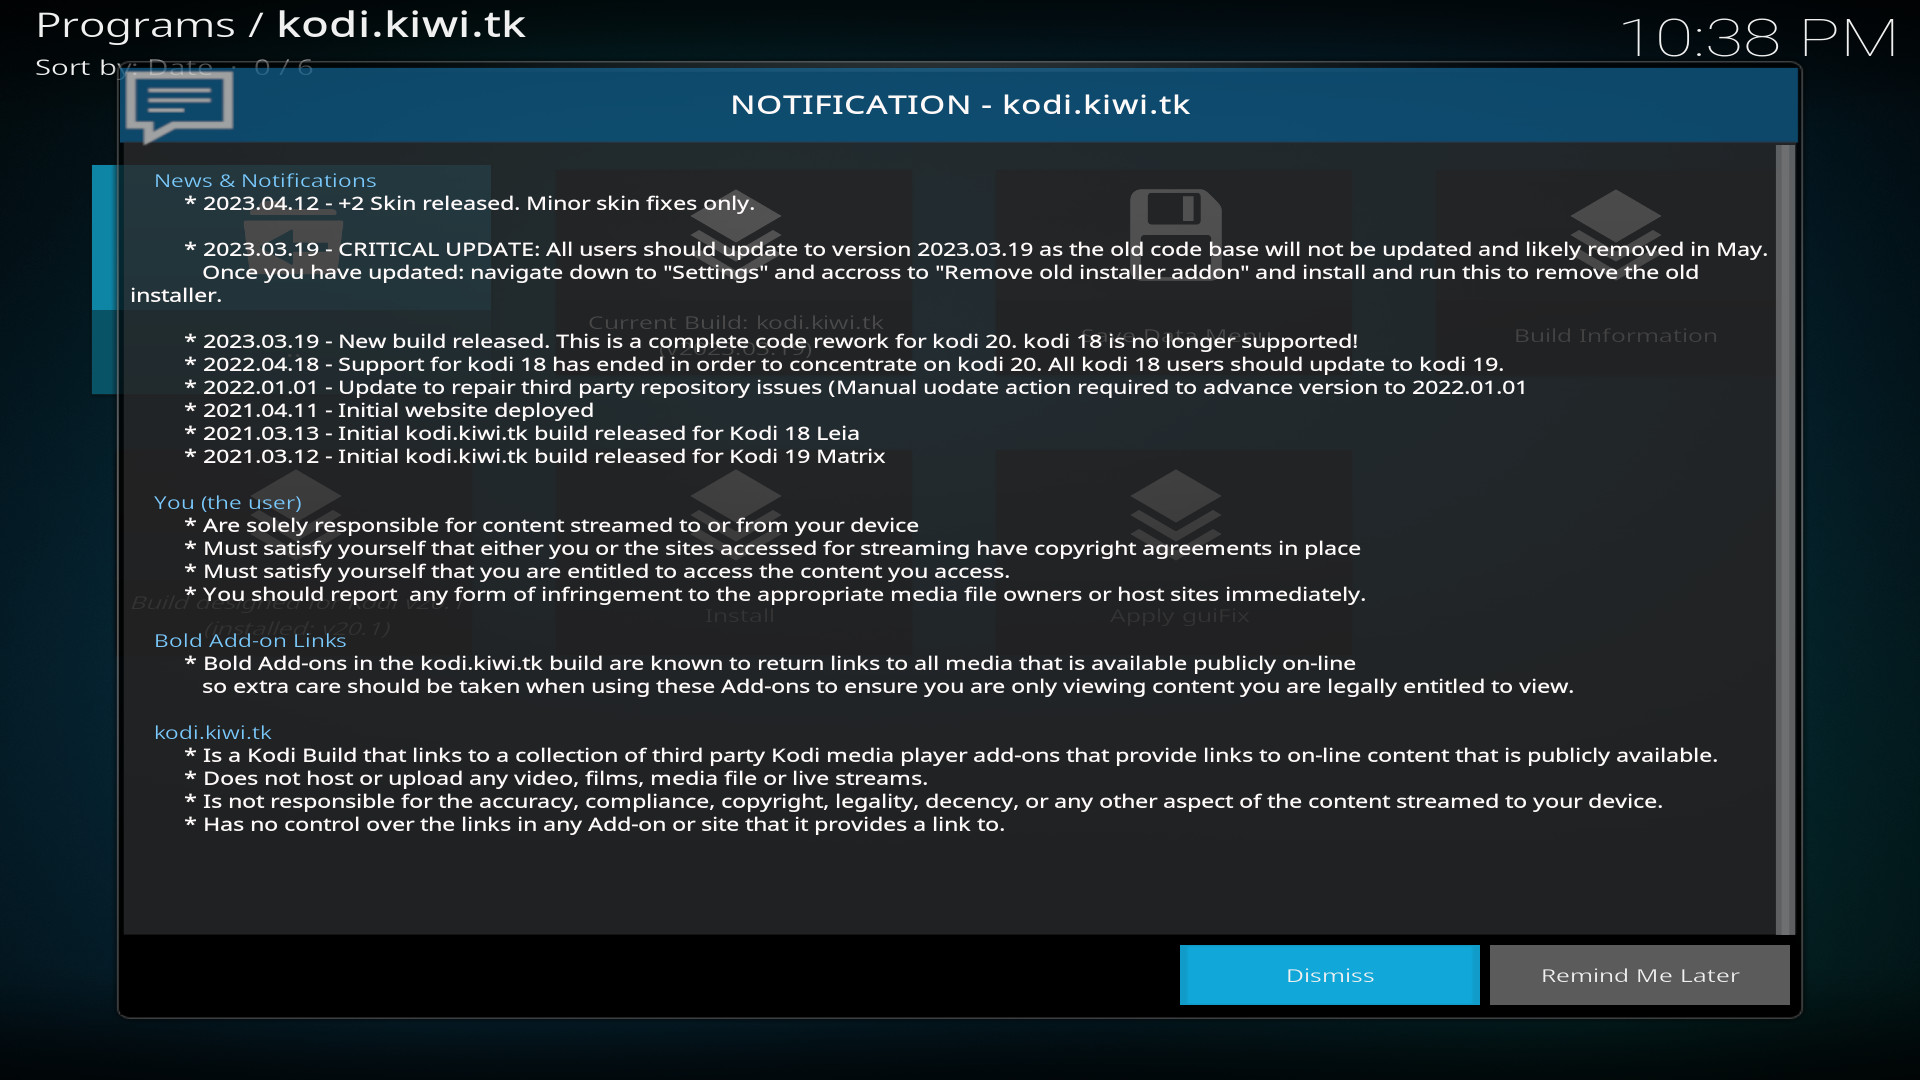
Read the news and notifications
Navigate to "Dismiss", press OK
Install step 8
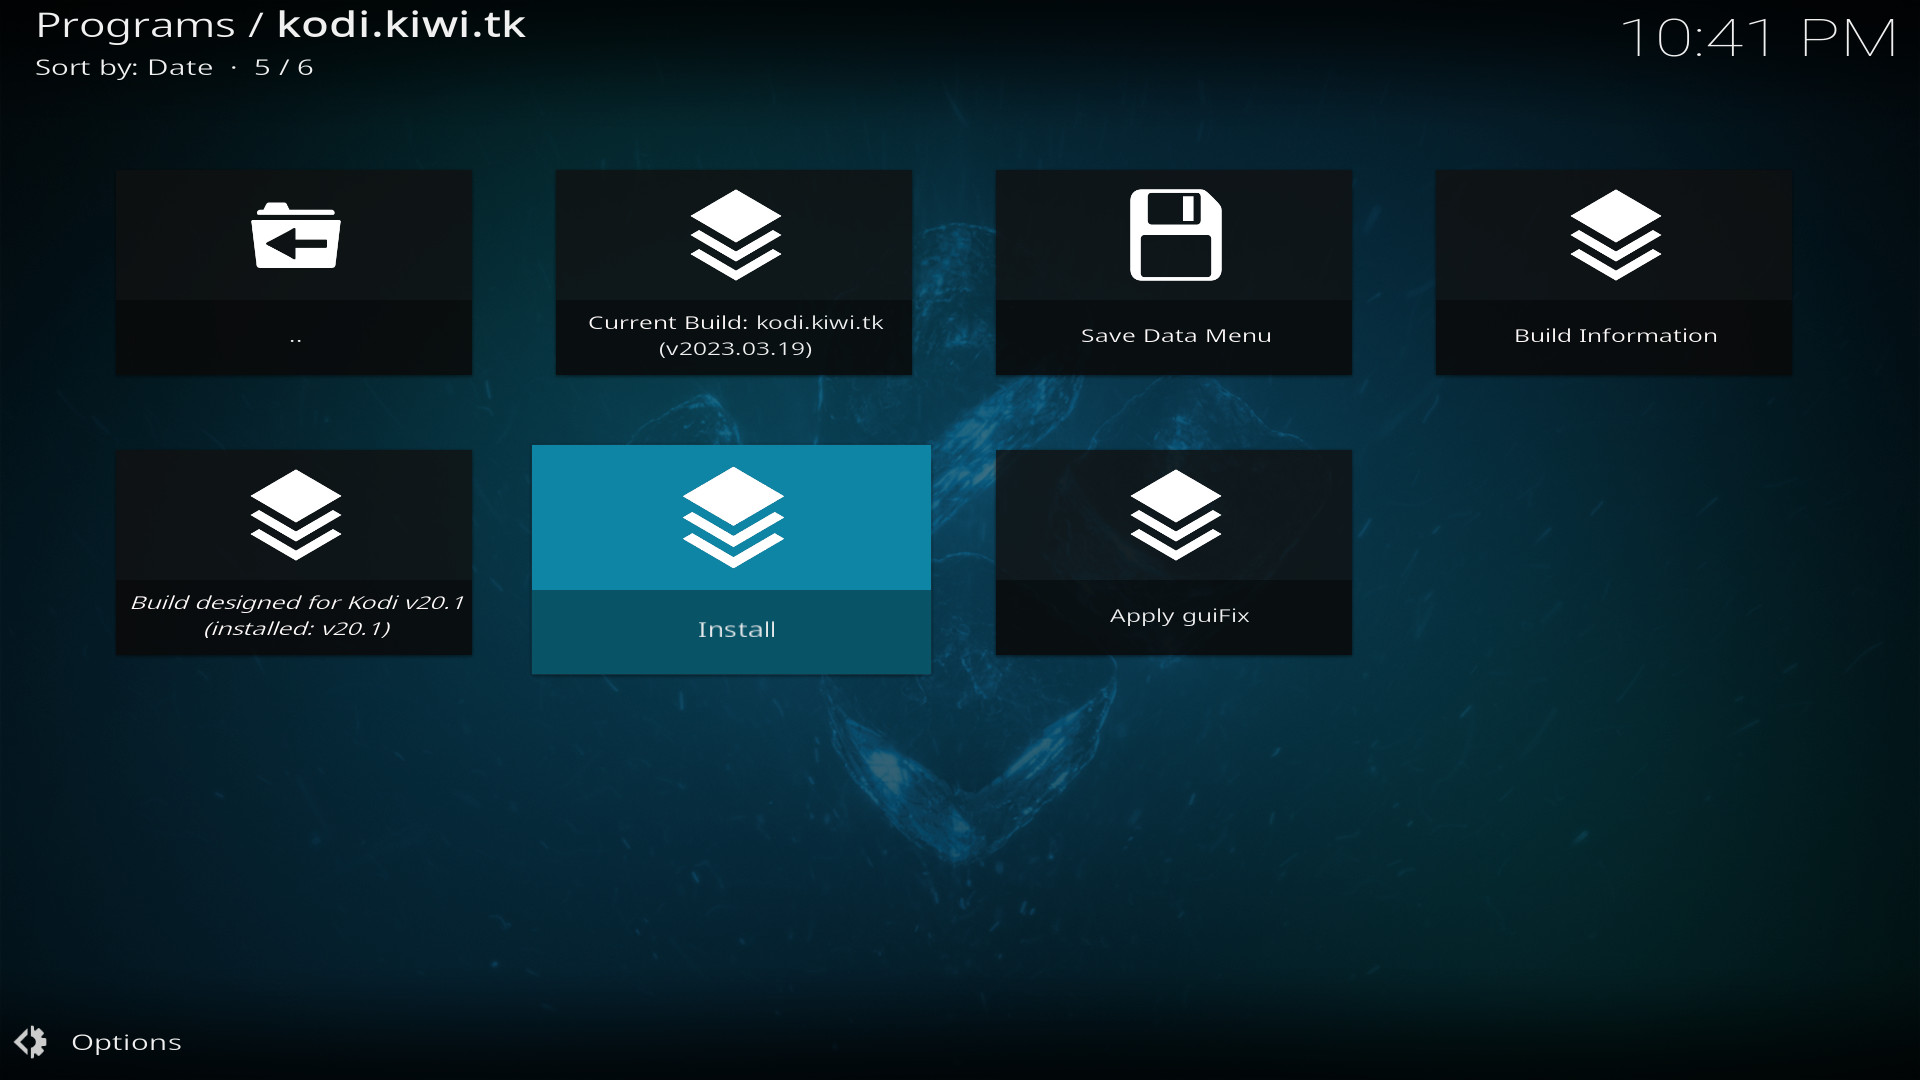
Navigate to "Install", press OK
Install step 9
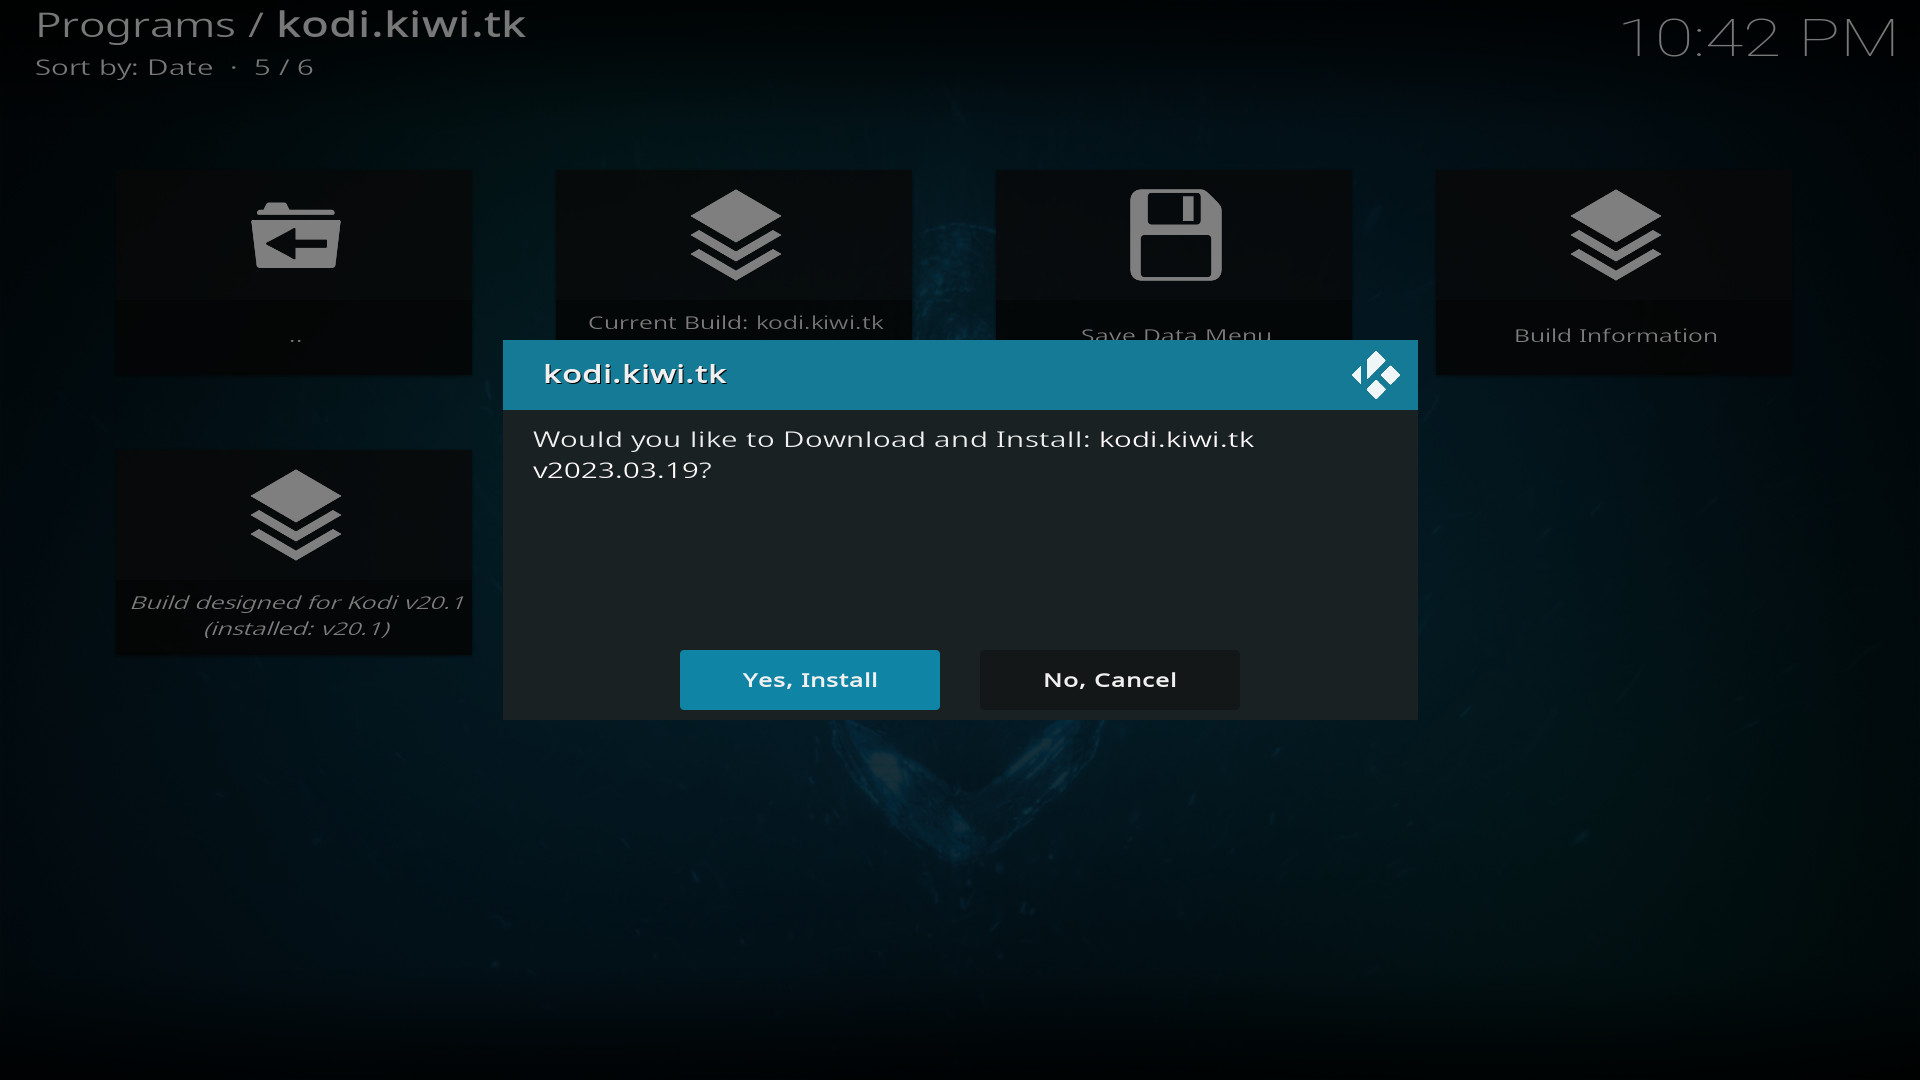
Navigate to "Yes, Install", press OK
Install step 10

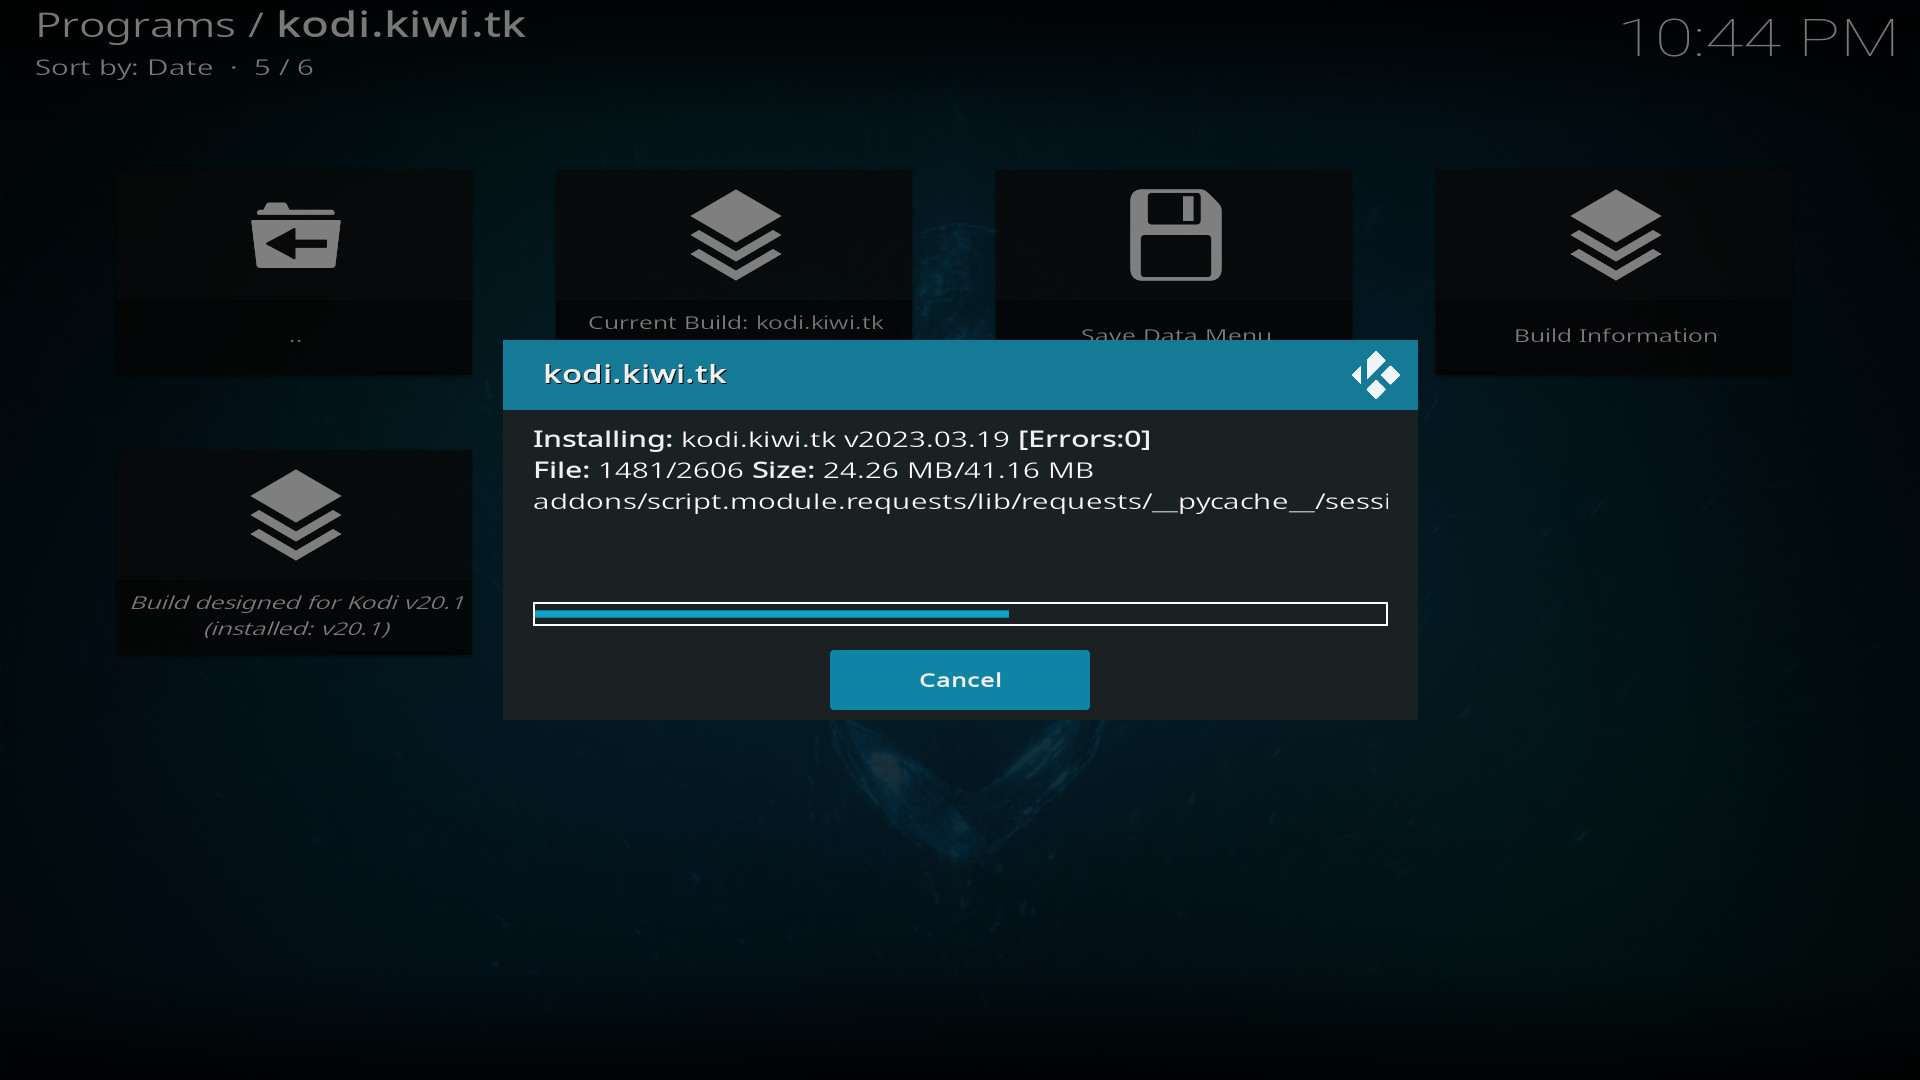
The kodi.kiwi.yt kodi build will now download and then decompress and install. Note: this may take a minute.
Install step 11
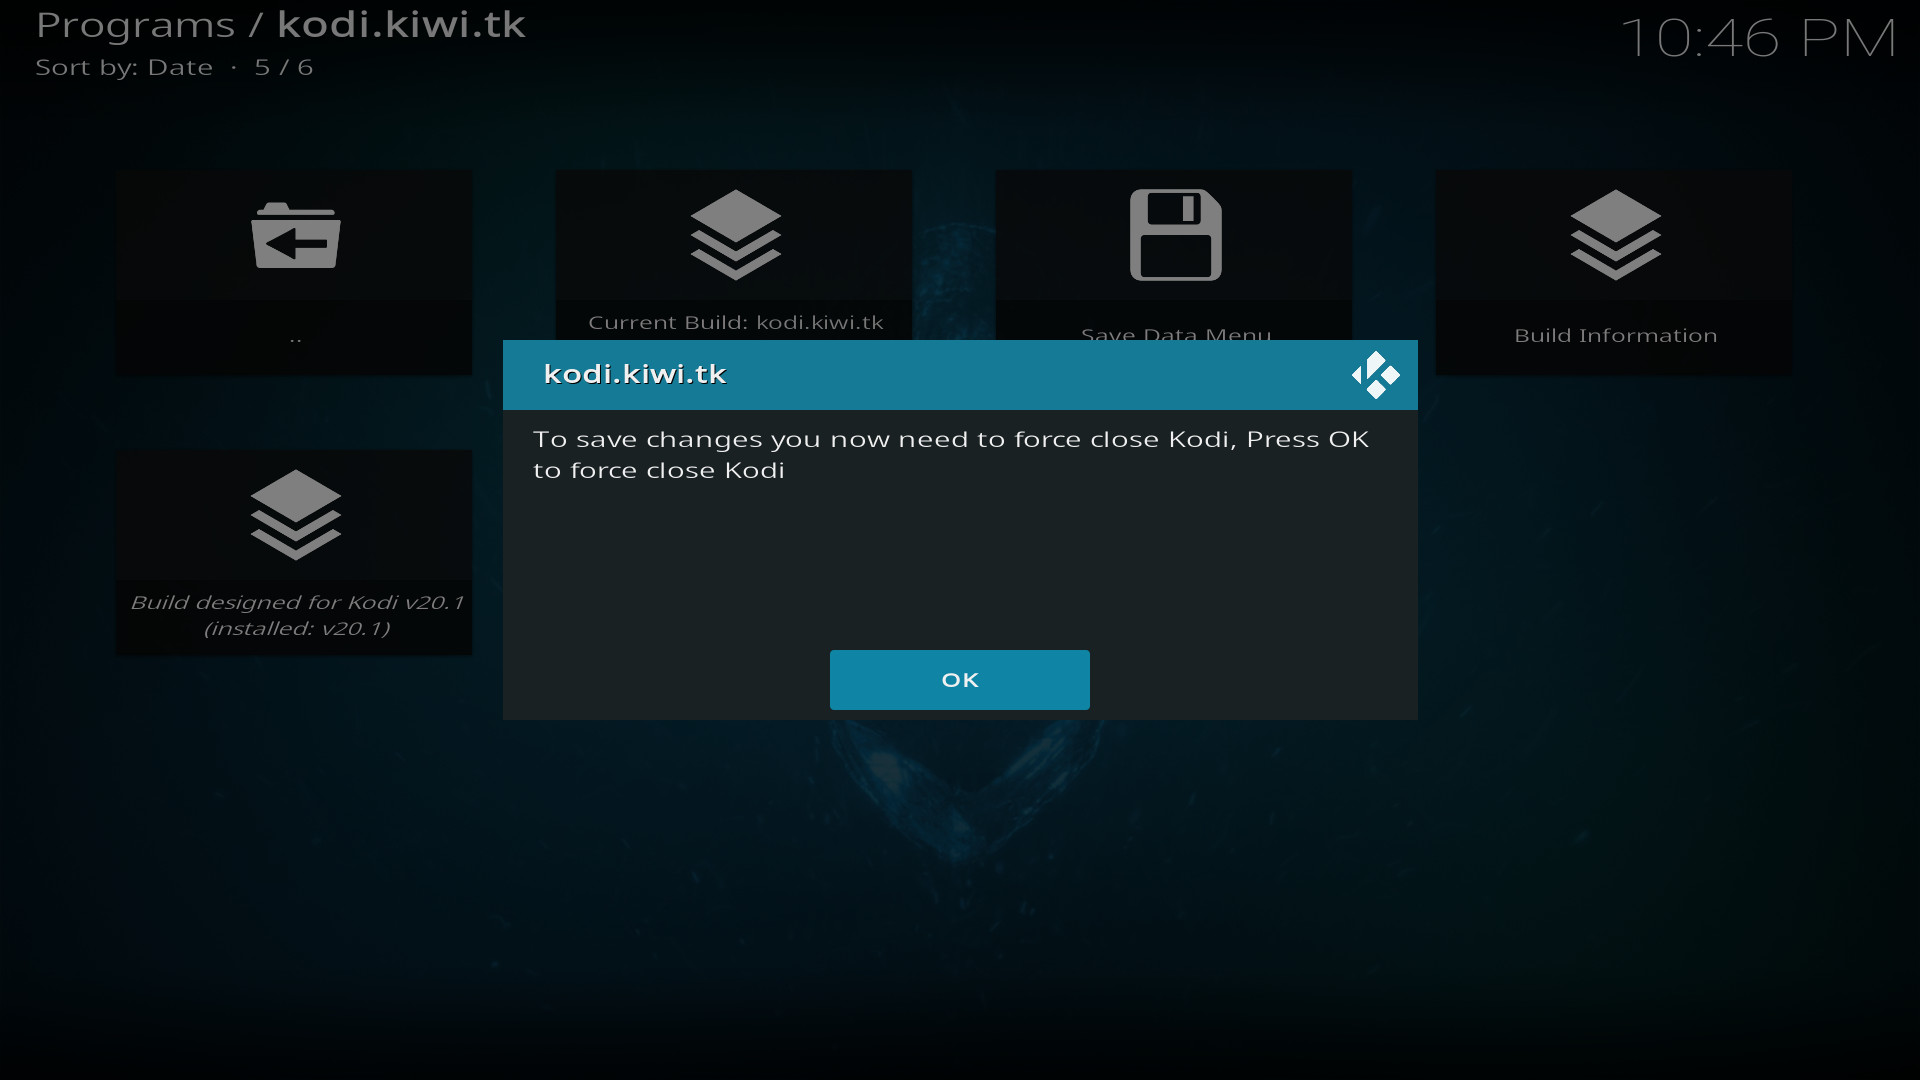
Press "OK" to close kodi.
Restart kodi and the kodi.kiwi.yt kodi build will be installed.
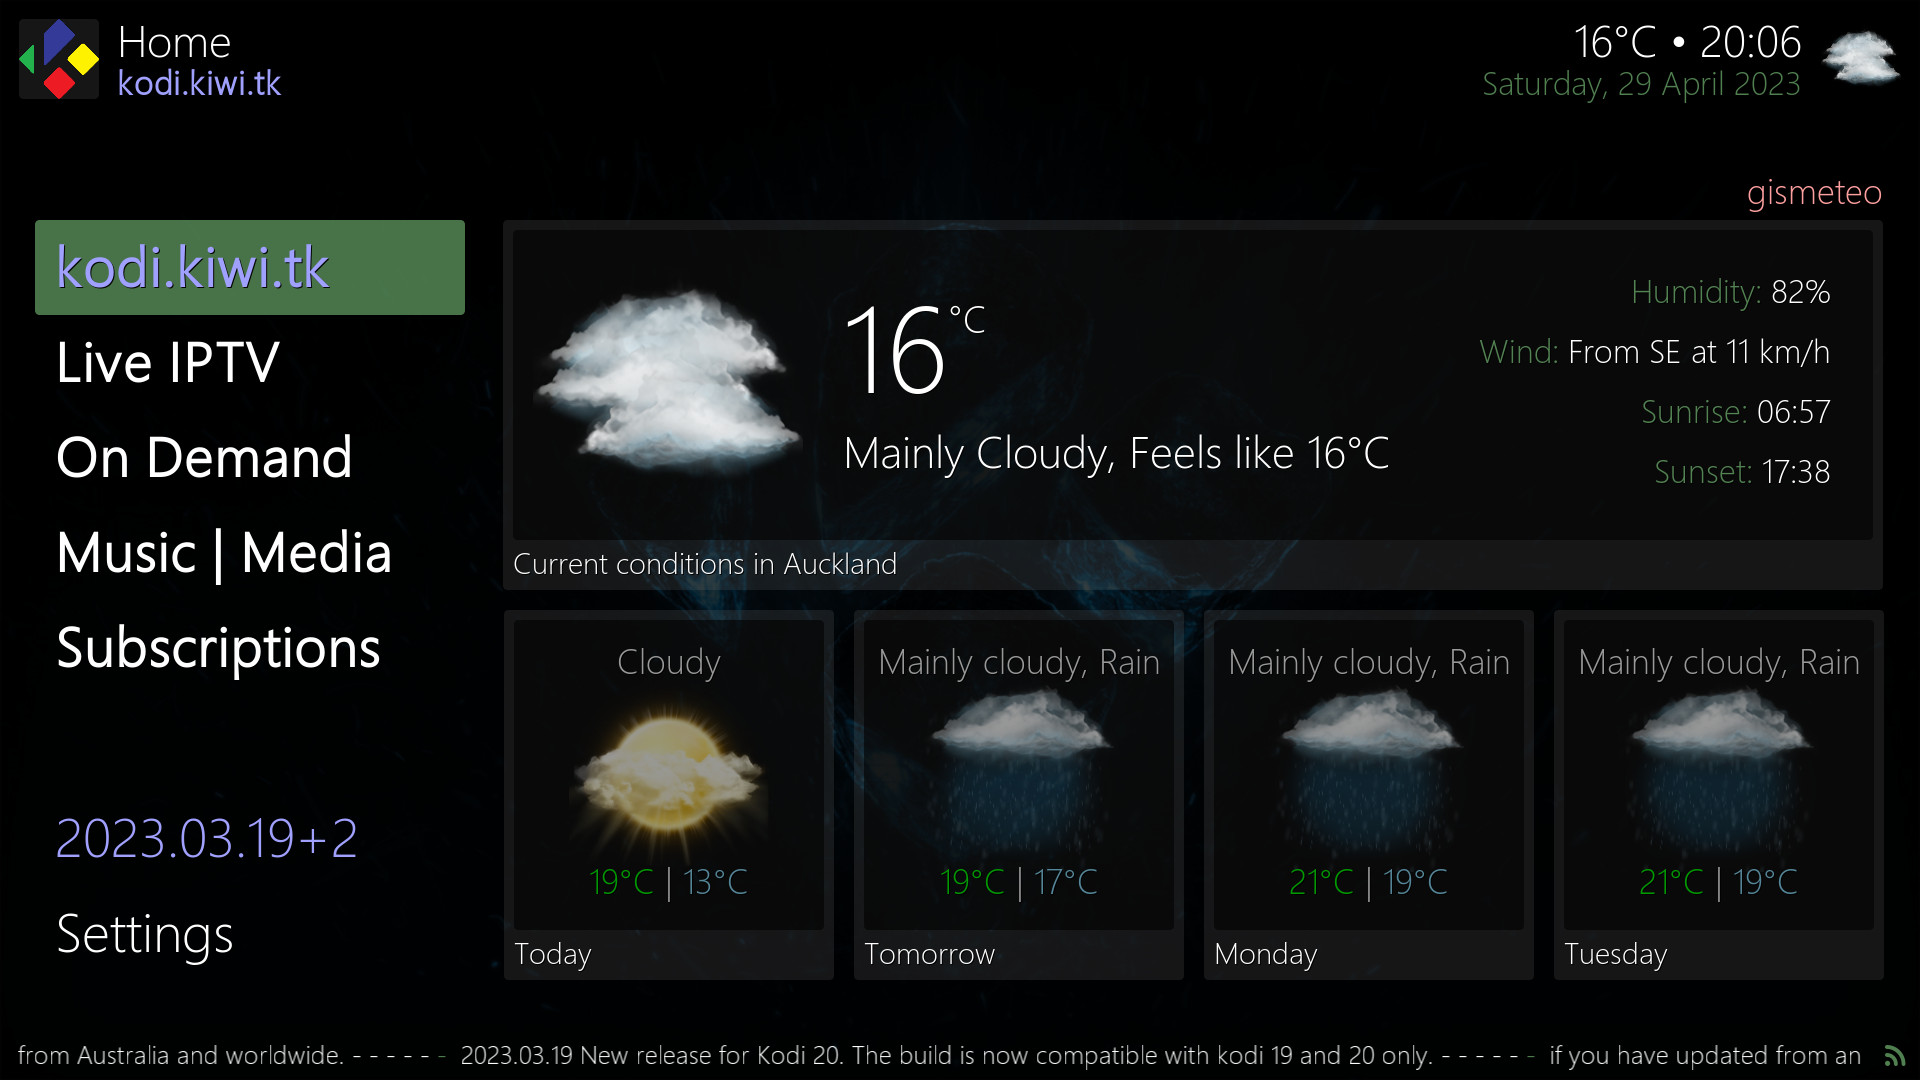
Interface | kodi.kiwi.yt
The kodi.kiwi.yt kodi build interface provides links to kodi addons divided into simple catagories. Live IPTV for addons that provide links to live stream content. On Demand for links to on demand content. Music | Media for links to radio, music and local media. Subscriptions for addons that provide paid subscription content.